Summary: This article explains how to download OS X Mavericks ISO, DMG, and full installer files. It also describes how to obtain Mavericks without using the Mac App Store and how to create a bootable USB installer.
This article is written in Canadian English and intended for readers in Canada.
OS X Mavericks is the tenth major release of Apple's Mac operating system. Introduced in 2013, it focused on improving battery life, refining Finder performance, introducing file compression, and expanding iCloud integration. It was also the first OS X version to be offered as a free upgrade, setting the foundation for Apple's free macOS updates.
Although OS X Mavericks is now an older release, some users still download it to support legacy applications or to continue using the Aqua-style interface. This guide provides access to Mavericks ISO, DMG, and full installer files.
Tips: Before downloading or installing OS X Mavericks, it is recommended to review how to download and install macOS to reduce the risk of errors or interruptions.
If you require OS X Mavericks for use on a Windows PC, refer instead to: Mac OS Download for Windows
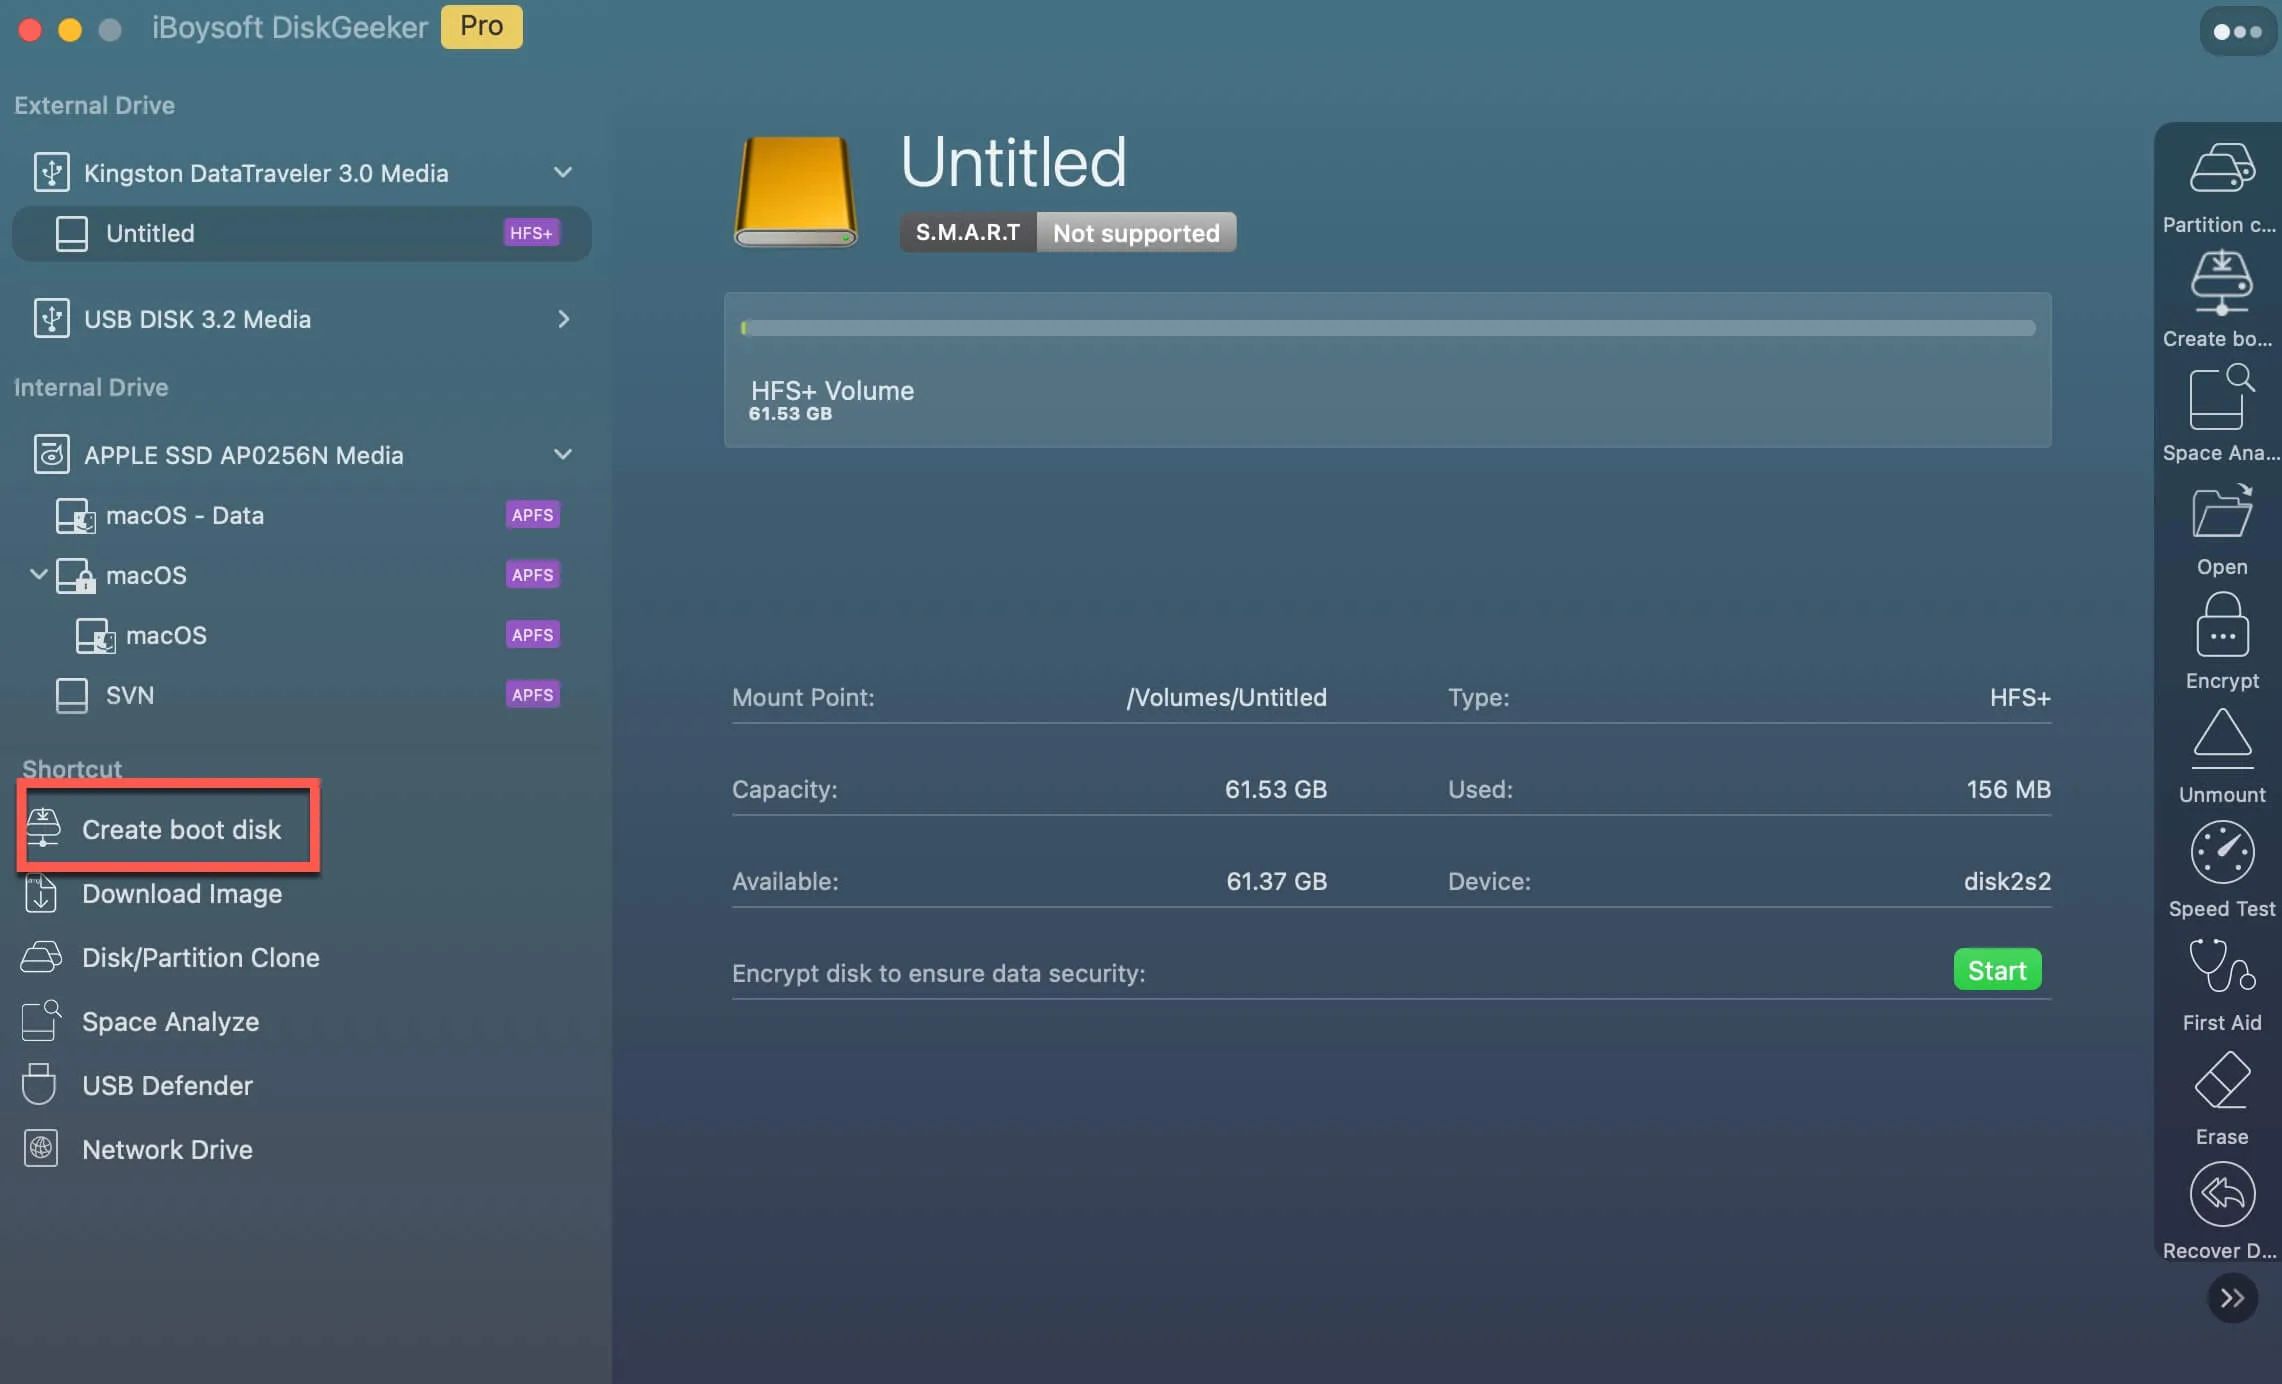
Note: Using iBoysoft DiskGeeker is one of the most reliable ways to download an OS X Mavericks bootable installer. The tool provides bootable DMG files for Mavericks and other macOS versions, and it also simplifies the creation of bootable USB installers.
Step 1: Download, install, and open iBoysoft DiskGeeker.
Step 2: From the Shortcut panel on the left, click Download Image.

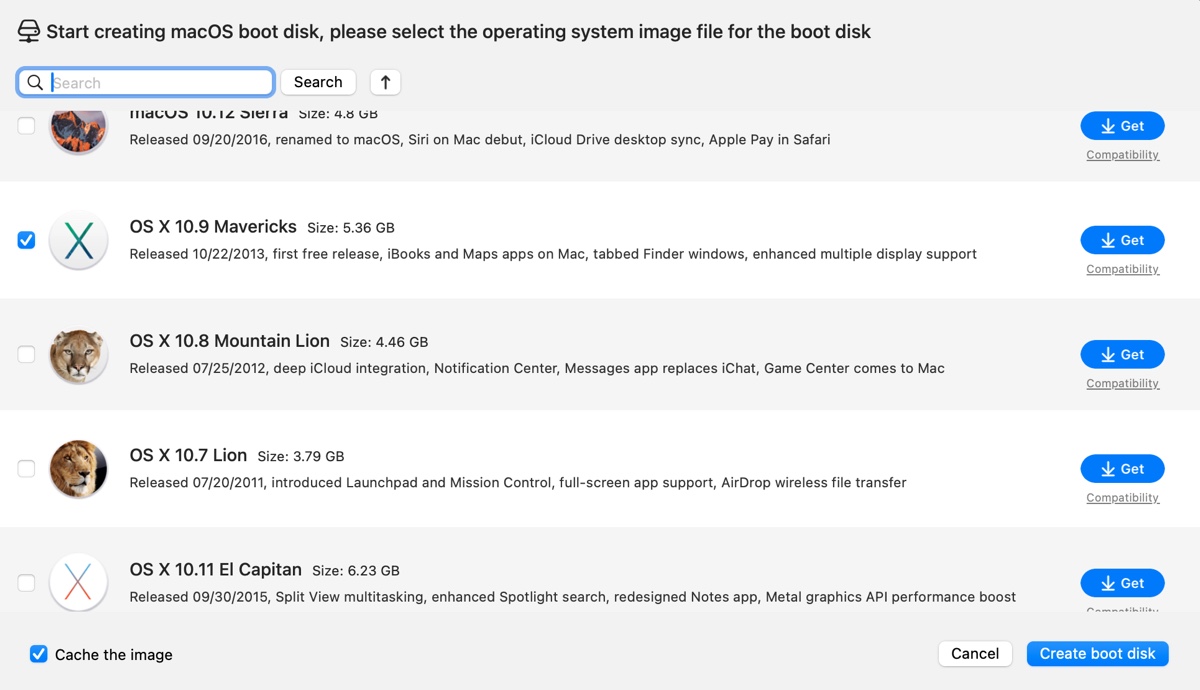
Step 3: Select OS X 10.9 Mavericks and click Get.
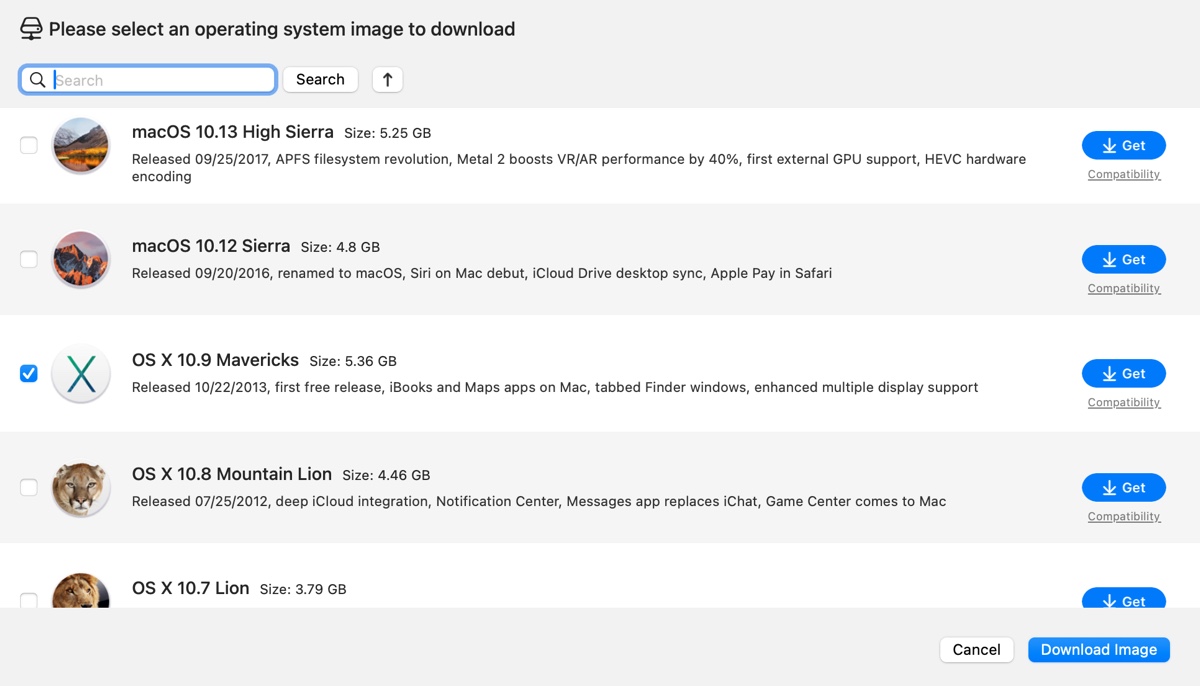
Step 4: Wait until the download process is complete.
How to download OS X Mavericks installer?
The Mac App Store is the first place to check for the OS X Mavericks installer. You can search for Mavericks to see whether it is still available. If it does not appear, the installer can be downloaded without using the App Store from archived sources.
The OS X Mavericks installer file size is approximately 5 GB.
OS X Mavericks installer free download (archive.org) link 1
OS X Mavericks installer free download (archive.org) link 2
OS X Mavericks installer free download (archive.org) link 3
OS X Mavericks installer free download (archive.org) link 4
OS X Mavericks installer free download (mega)
To access installers for other macOS versions, see: Free Download macOS Full Installers for Latest & Old Version
Share these Mavericks download links if you find them helpful!
How to download OS X Mavericks DMG?
An OS X Mavericks DMG file is a disk image that contains the Mavericks installer. When mounted, it acts like a virtual disk and allows access to the installer application.

Here are the download links to OS X Mavericks DMG files:
OS X 10.9 Mavericks DMG free download (allmacworlds.com)
OS X 10.9.5 Mavericks DMG free download (allmacworlds.com)
OS X 10.9 Mavericks DMG free download (archive.org) link 1
OS X 10.9 Mavericks DMG free download (archive.org) link 2
OS X 10.9.4 Mavericks ESD DMG (archive.org)
OS X 10.9 Mavericks Install DVD DMG (archive.org)
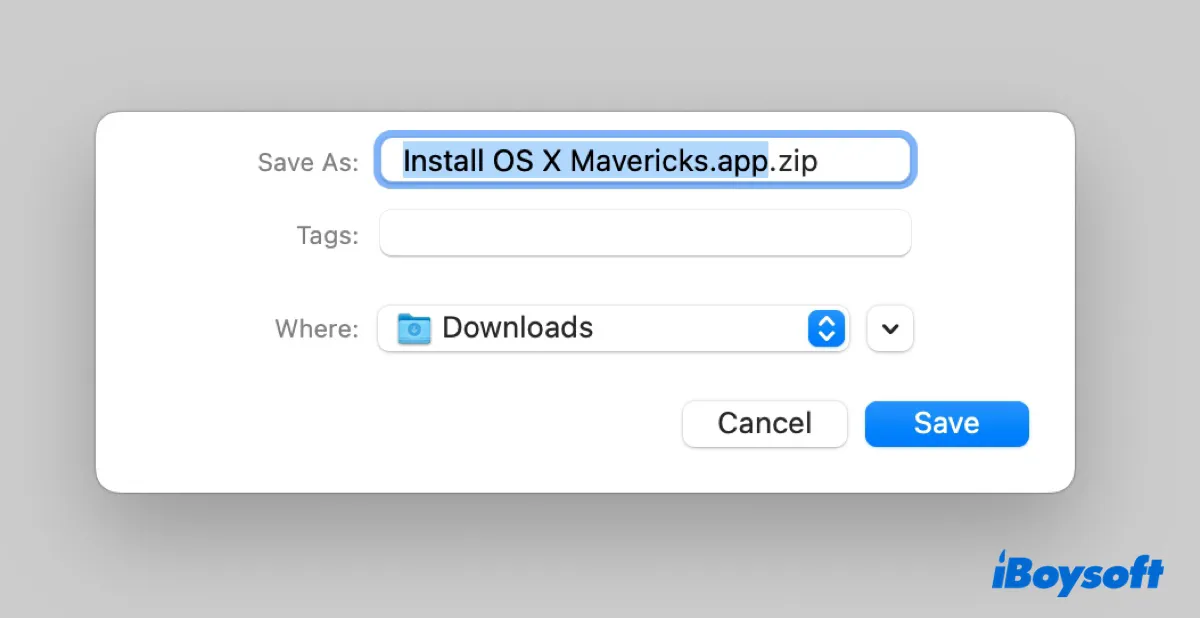
After the DMG file has finished downloading, double-click it to mount the image. Then drag the Install OS X Mavericks application into the Applications folder for installation or for creating bootable media.
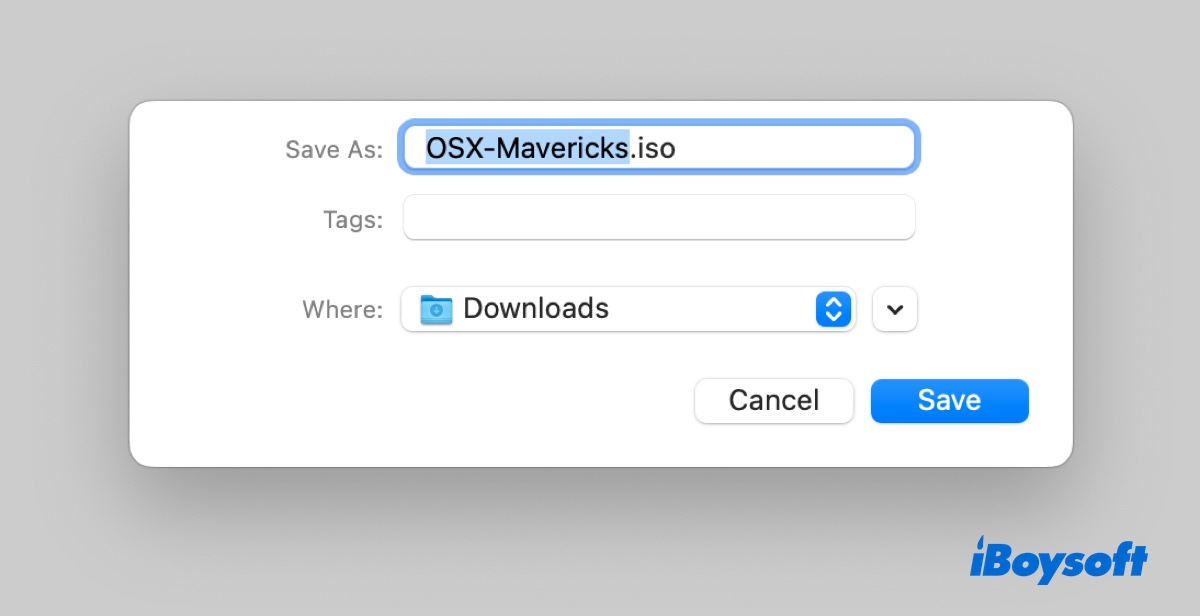
How to download OS X Mavericks ISO?
An OS X Mavericks ISO file contains the complete operating system, including all features and updates available at the time of release. This format is required if you plan to install Mavericks on a virtual machine, such as VirtualBox or VMware.
ISO files can be downloaded from archived sources:
OS X Mavericks ISO Download for VirtualBox/VMware (allmacworlds.com)
OS X 10.9.5 Mavericks ISO download (archive.org)
How to create OS X Mavericks bootable USB installer?
Tips: Creating a bootable OS X Mavericks USB installer manually requires careful execution and can be time-consuming. If you prefer a more straightforward method, iBoysoft DiskGeeker offers a guided alternative to tools such as DiskMaker X.
Step 1: Install iBoysoft DiskGeeker and launch the application.
Step 2: In the Shortcut section, select Create boot disk.
Step 3: Choose your external USB drive and click Select > Continue.

Step 4: Select OS X 10.9 Mavericks and click Create boot disk.
Step 5: Follow the on-screen instructions to complete the process.
To manually create an OS X Mavericks bootable USB installer, you will need a USB or external drive with at least 8 GB of storage (all existing data will be erased), a working macOS system, and the official OS X Mavericks installer.
Follow these steps carefully:
- Open Disk Utility on your Mac.
- Click View > Show All Devices to display all connected disks and partitions.
- Select the physical disk of your external USB drive and click Erase.
-
Name the drive as desired.
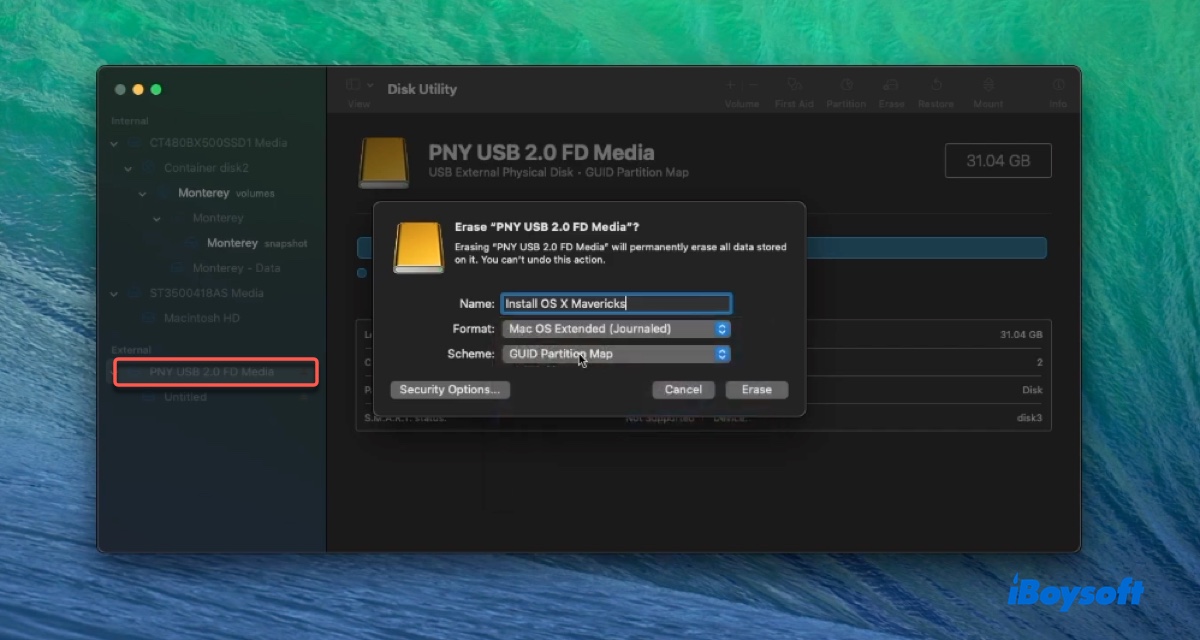
- Choose Mac OS Extended (Journaled) as the format.
- Set the scheme to GUID Partition Map, then click Erase and wait for the process to finish.
- If the Mavericks installer is compressed, double-click it to decompress it.
- Right-click Install OS X Mavericks and choose Show Package Contents.
- Navigate to Contents > SharedSupport > InstallESD.dmg, then double-click it to open.
-
Press Command + Shift + Period to reveal hidden files. If your Mac doesn't support the shortcut, open Terminal, run the following command, then relaunch Finder by clicking the Apple menu, choosing "Force Quit", selecting Finder, and clicking Relaunch.defaults write com.apple.Finder AppleShowAllFiles true
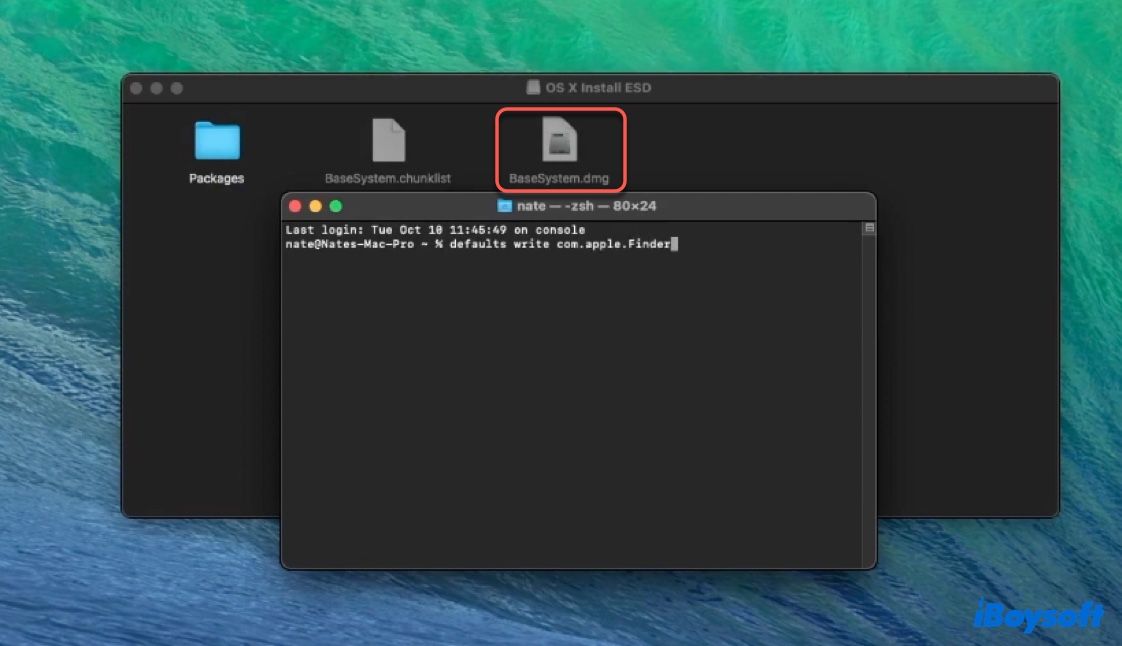
- Locate BaseSystem.dmg, open Disk Utility, select the USB partition, and click Restore.
-
Drag BaseSystem.dmg into the Restore from field and click Restore.

- After the restore process completes, the USB drive will be renamed OS X Base System. You may rename it to Install OS X Mavericks if preferred.
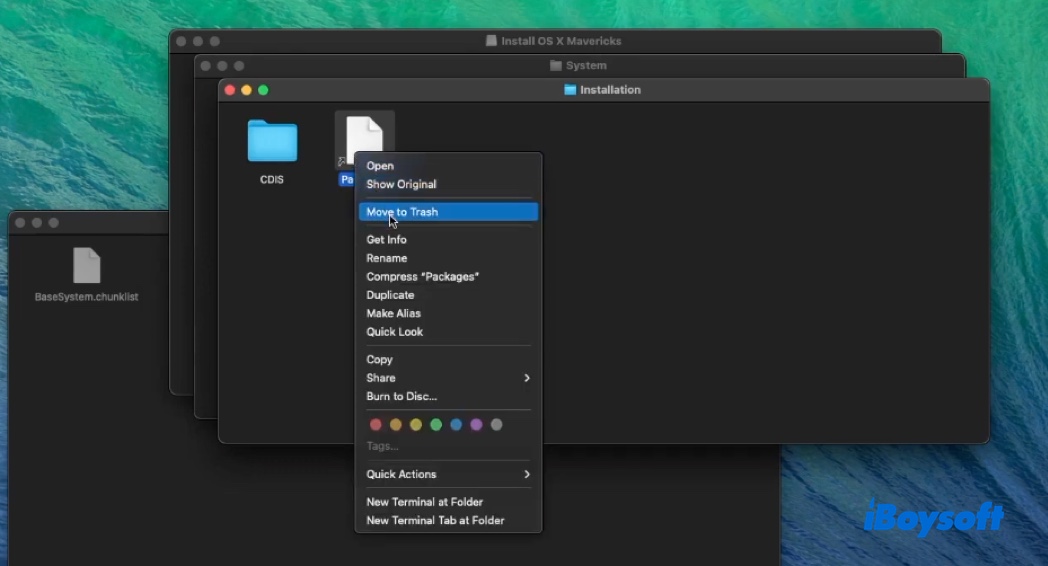
- Open the restored USB drive and go to System > Installation.
-
Delete the existing Packages folder.
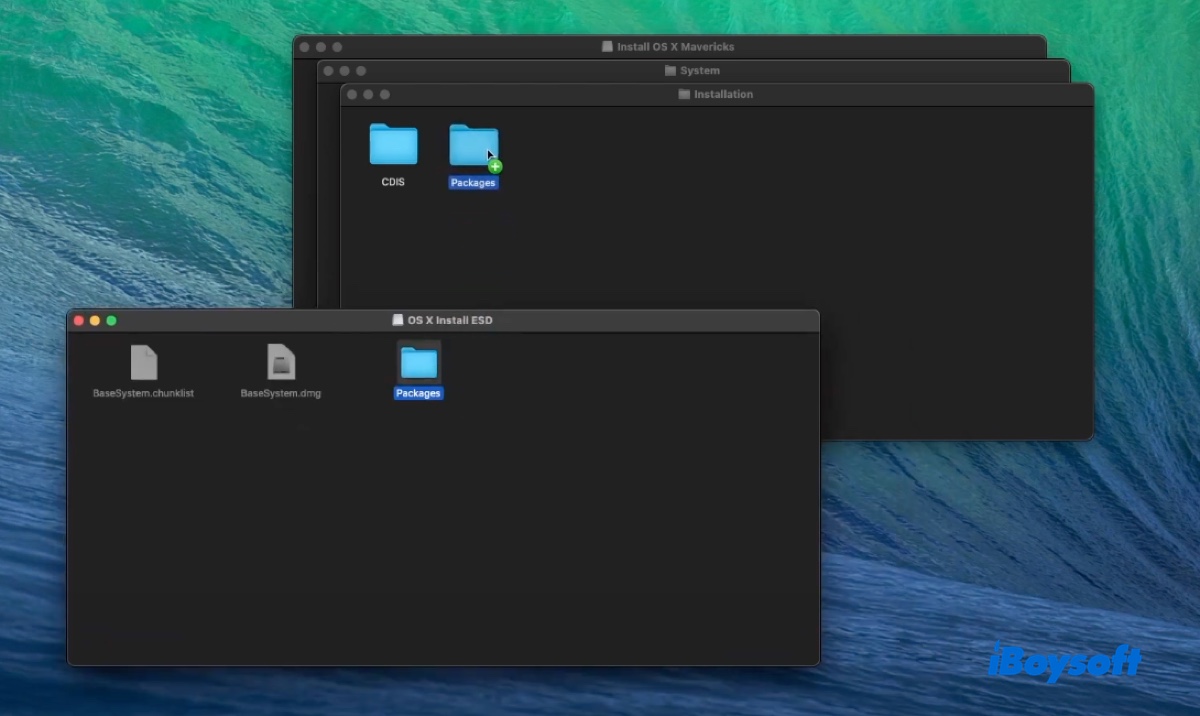
- Go back to InstallESD.dmg, right-click Install OS X Mavericks, and select Show Package Contents again.
- Navigate to Contents > SharedSupport, then copy the Packages folder.
-
Paste this Packages folder into System > Installation on the USB drive.
After completing these steps, the external drive will function as a bootable OS X Mavericks USB installer, which you can use to start a Mac and install Mavericks.
Share the steps to help others create a bootable Mavericks USB installer on Mac.